![]()
![]()


 ## Configuring the Raspberry Pi
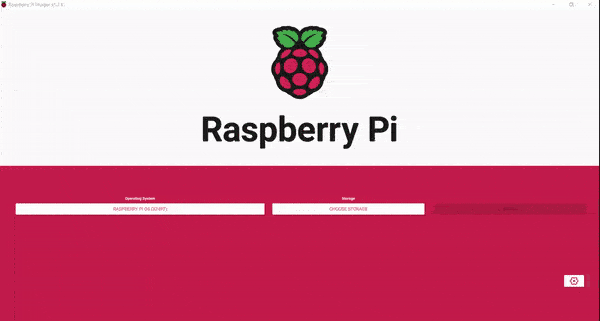
1. Flash Raspberry Pi OS according to the [instructions](https://www.raspberrypi.org/software/). Leave the SD card plugged in your computer.
2. Create and download `settings.json` file for Inkycal from the [WEB-UI](https://aceisace.eu.pythonanywhere.com/inkycal-config-v2-0-0).
3. Download the `ssh` text file from the [WEB-UI](https://aceisace.eu.pythonanywhere.com/create_ssh).
4. Create and download a WiFi-configuration file (`wpa_supplicant.conf`) from the [WEB-UI](https://aceisace.eu.pythonanywhere.com/setup_wifi)
5. Copy these three downloaded files (`settings.json`, `ssh`, `wpa_supplicant.conf`) to the flashed microSD card in the `/boot` folder of microSD card. On Windows, this is the only visible directory on the SD card. On Linux, copy these files to `/boot` of the microSD card.
6. Eject the microSD card from your computer now, insert it in the Raspberry Pi and power the Raspberry Pi.
7. Once the green LED has stopped blinking after ~3 minutes, use an SSH client to connect to the Raspberry Pi. On Windows, you can use PUTTY, but you can also use an SSH App.
on your smartphone. Use the address: `raspberrypi.local` with `pi` as the username and `raspberry` as the password. For more detailed instructions, check out the page from the [Raspberry Pi website](https://www.raspberrypi.org/documentation/remote-access/ssh/)
8. After connecting via SSH, run the following commands, line by line:
```bash
sudo raspi-config --expand-rootfs
sudo sed -i s/#dtparam=spi=on/dtparam=spi=on/ /boot/config.txt
sudo dpkg-reconfigure tzdata
```
These commands expand the filesystem, enable SPI and set up the correct timezone on the Raspberry Pi. When running the last command, please select the continent you live in, press enter and then select the capital of the country you live in. Lastly, press enter.
10. Change the password for the user pi by entering `passwd` in the Terminal, enter your current password, hit enter, then type your new password and press enter. Please note you will have to remember this password to access your Raspberry Pi.
11. Follow the steps in `Installation` (see below) on how to install Inkycal.
*Sounds too complicated or cannot source the parts yourself? We've got you covered, you can now purchase a fully configured Inkycal on Tindie. These work as simple as plug-and-play. All the hard work is done in advance for you :100:*
[
## Configuring the Raspberry Pi
1. Flash Raspberry Pi OS according to the [instructions](https://www.raspberrypi.org/software/). Leave the SD card plugged in your computer.
2. Create and download `settings.json` file for Inkycal from the [WEB-UI](https://aceisace.eu.pythonanywhere.com/inkycal-config-v2-0-0).
3. Download the `ssh` text file from the [WEB-UI](https://aceisace.eu.pythonanywhere.com/create_ssh).
4. Create and download a WiFi-configuration file (`wpa_supplicant.conf`) from the [WEB-UI](https://aceisace.eu.pythonanywhere.com/setup_wifi)
5. Copy these three downloaded files (`settings.json`, `ssh`, `wpa_supplicant.conf`) to the flashed microSD card in the `/boot` folder of microSD card. On Windows, this is the only visible directory on the SD card. On Linux, copy these files to `/boot` of the microSD card.
6. Eject the microSD card from your computer now, insert it in the Raspberry Pi and power the Raspberry Pi.
7. Once the green LED has stopped blinking after ~3 minutes, use an SSH client to connect to the Raspberry Pi. On Windows, you can use PUTTY, but you can also use an SSH App.
on your smartphone. Use the address: `raspberrypi.local` with `pi` as the username and `raspberry` as the password. For more detailed instructions, check out the page from the [Raspberry Pi website](https://www.raspberrypi.org/documentation/remote-access/ssh/)
8. After connecting via SSH, run the following commands, line by line:
```bash
sudo raspi-config --expand-rootfs
sudo sed -i s/#dtparam=spi=on/dtparam=spi=on/ /boot/config.txt
sudo dpkg-reconfigure tzdata
```
These commands expand the filesystem, enable SPI and set up the correct timezone on the Raspberry Pi. When running the last command, please select the continent you live in, press enter and then select the capital of the country you live in. Lastly, press enter.
10. Change the password for the user pi by entering `passwd` in the Terminal, enter your current password, hit enter, then type your new password and press enter. Please note you will have to remember this password to access your Raspberry Pi.
11. Follow the steps in `Installation` (see below) on how to install Inkycal.
*Sounds too complicated or cannot source the parts yourself? We've got you covered, you can now purchase a fully configured Inkycal on Tindie. These work as simple as plug-and-play. All the hard work is done in advance for you :100:*
[ ](https://www.tindie.com/products/aceisace4444/inkycal-build-v1/)
Do note that these are made on demand and not always available, best to keep checking :wink:
## Installing Inkycal
The previous installer has been deprecated to give more transparency about the installation of Inkycal.
Run the following steps to install Inkycal. Do **not** use sudo for this, except where explicitly specified.
```bash
# the next line is for the Raspberry Pi only
sudo apt-get install zlib1g libjpeg-dev libatlas-base-dev rustc libopenjp2-7 python3-dev scons libssl-dev python3-venv python3-pip git libfreetype6-dev
cd $HOME
git clone --branch main --single-branch https://github.com/aceisace/Inkycal
cd Inkycal
python3 -m venv venv
source venv/bin/activate
python -m pip install --upgrade pip
pip install wheel
pip install -e ./
# If you are running on the Raspberry Pi, please install the following too to allow rendering on the display
pip install RPi.GPIO==0.7.1 spidev==3.5
```
## Running Inkycal
To run Inkycal, type in the following command in the terminal:
```bash
cd $HOME/Inkycal
source venv/bin/activate
python3 inky_run.py
```
## Running on each boot
To make inkycal run on each boot automatically, you can use crontab. Do not use sudo for this
```bash
(crontab -l ; echo "@reboot sleep 60 && cd $HOME/Inkycal && venv/bin/python inky_run.py &")| crontab -
```
## Updating Inkycal
To update Inkycal to the latest version, navigate to the Inkycal folder, then run:
```bash
git pull
```
Yep. It's actually that simple!
But, if you have made changes to Inkycal, those will be overwritten.
If that is the case, backup your modified files somewhere else if you need them. Then run:
```bash
git reset --hard
git pull
```
## Uninstalling Inkycal
We'll miss you, but we don't want to make it hard for you to leave.
Just delete the Inkycal folder, and you're good to go!
Additionally, if you want to reset your crontab file, which runs inkycal at boot, run:
```bash
crontab -r
```
## Modifying Inkycal
Inkycal now runs in a virtual environment to support more devices than just the Raspberry Pi. Therefore, to make changes to Inkycal, navigate to Inkycal, then run:
```bash
cd $HOME/Inkycal && source venv/bin/activate
```
Then modify the files as needed and experiment with Inkycal.
To deactivate the virtual environment, simply run:
```bash
deactivate
```
## Contributing
All sorts of contributions are most welcome and appreciated. To start contributing, please follow the [Contribution Guidelines](https://github.com/aceisace/Inkycal/blob/development/CONTRIBUTING.md).
The average response time for issues, PRs and emails is usually 24 hours. In some cases, it might be longer. If you want to have some faster responses, please use Discord (link below)
**P.S:** Don't forget to star and/or watch the repo. For those who have done so already, thank you very much!
## Join us on Discord!
We're happy to help, to beginners and developers alike. In fact, you are more likely to get faster support on Discord than on Github.
](https://www.tindie.com/products/aceisace4444/inkycal-build-v1/)
Do note that these are made on demand and not always available, best to keep checking :wink:
## Installing Inkycal
The previous installer has been deprecated to give more transparency about the installation of Inkycal.
Run the following steps to install Inkycal. Do **not** use sudo for this, except where explicitly specified.
```bash
# the next line is for the Raspberry Pi only
sudo apt-get install zlib1g libjpeg-dev libatlas-base-dev rustc libopenjp2-7 python3-dev scons libssl-dev python3-venv python3-pip git libfreetype6-dev
cd $HOME
git clone --branch main --single-branch https://github.com/aceisace/Inkycal
cd Inkycal
python3 -m venv venv
source venv/bin/activate
python -m pip install --upgrade pip
pip install wheel
pip install -e ./
# If you are running on the Raspberry Pi, please install the following too to allow rendering on the display
pip install RPi.GPIO==0.7.1 spidev==3.5
```
## Running Inkycal
To run Inkycal, type in the following command in the terminal:
```bash
cd $HOME/Inkycal
source venv/bin/activate
python3 inky_run.py
```
## Running on each boot
To make inkycal run on each boot automatically, you can use crontab. Do not use sudo for this
```bash
(crontab -l ; echo "@reboot sleep 60 && cd $HOME/Inkycal && venv/bin/python inky_run.py &")| crontab -
```
## Updating Inkycal
To update Inkycal to the latest version, navigate to the Inkycal folder, then run:
```bash
git pull
```
Yep. It's actually that simple!
But, if you have made changes to Inkycal, those will be overwritten.
If that is the case, backup your modified files somewhere else if you need them. Then run:
```bash
git reset --hard
git pull
```
## Uninstalling Inkycal
We'll miss you, but we don't want to make it hard for you to leave.
Just delete the Inkycal folder, and you're good to go!
Additionally, if you want to reset your crontab file, which runs inkycal at boot, run:
```bash
crontab -r
```
## Modifying Inkycal
Inkycal now runs in a virtual environment to support more devices than just the Raspberry Pi. Therefore, to make changes to Inkycal, navigate to Inkycal, then run:
```bash
cd $HOME/Inkycal && source venv/bin/activate
```
Then modify the files as needed and experiment with Inkycal.
To deactivate the virtual environment, simply run:
```bash
deactivate
```
## Contributing
All sorts of contributions are most welcome and appreciated. To start contributing, please follow the [Contribution Guidelines](https://github.com/aceisace/Inkycal/blob/development/CONTRIBUTING.md).
The average response time for issues, PRs and emails is usually 24 hours. In some cases, it might be longer. If you want to have some faster responses, please use Discord (link below)
**P.S:** Don't forget to star and/or watch the repo. For those who have done so already, thank you very much!
## Join us on Discord!
We're happy to help, to beginners and developers alike. In fact, you are more likely to get faster support on Discord than on Github.

